Last spring while working in the yard, my girlfriend and I were discussing what to do with the yard in order to develop a more usable space for relaxing and entertaining friends and family. The side of the house was basically unused without a gate. In discussing it, my girlfriend mentioned that an arbor entry gate would be nice. The natural order of things following a discussion like this is for me to start researching and to completely immerse myself in arbor and gate design. And that’s what I did…
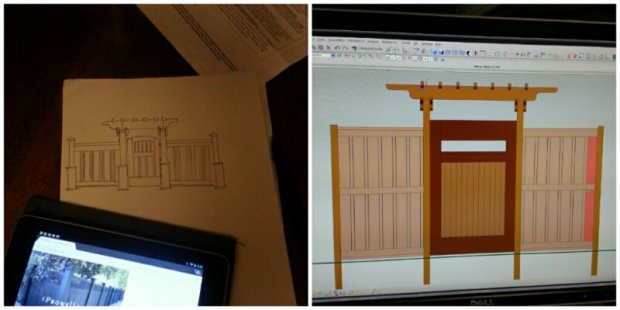
After a few sketches and some back and forth with my old lady, we decided on a particular style.
Once again, I leaned on my friend David for some assistance in the construction and fabrication. The workshop should look familiar if you follow his blog.
Treated lumber is made by saturating the wood with a water based chemical that slows rotting and prevents insects from moving in. This material often arrives at the store still wet and will twist and warp as it dries. I chose to use untreated pine lumber because it has been kiln dried which will prevent a lot of the twisting and warping that occurs when wood acclimate to its environment. Special care is needed to seal the lumber in order to prevent rotting. I’ll discuss this later.
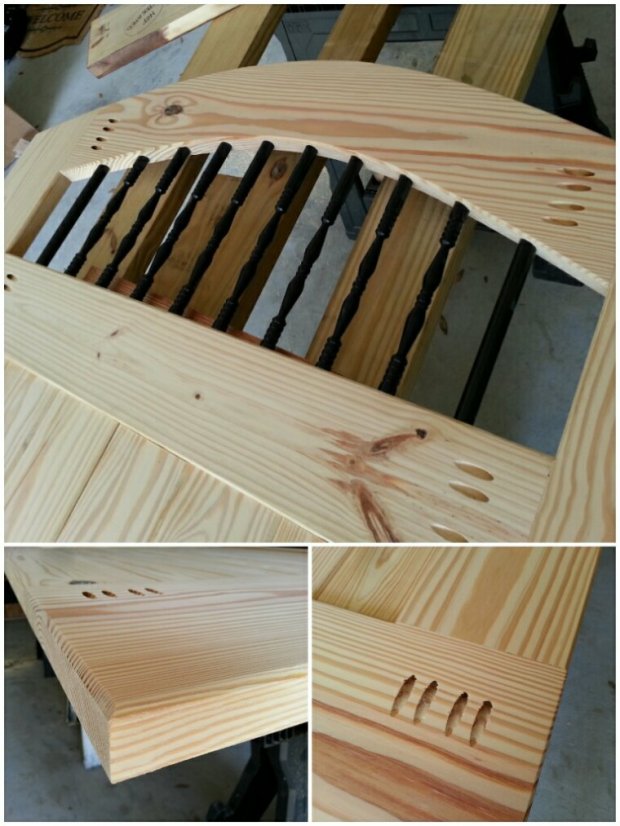
As you can see, the design changed from the screen shot shown above. The top of the gate was rounded. The speak easy was constructed using black powder coated aluminum rail bars taken from a kit sold in the deck and lumber section of a big box lumber store. The bars were cut down to size and press fit into the gate.
Once the gate was built, it was time to apply the finish and weather proofing. Not sure of the desired color, I set up a test board using scrap from the gates construction. I sanded the board with the same schedule that I used on the actual gate. Once over with 80 grit and a final pass with 180 grit. I then applied several stain colors and let them dry. The next step in the color selection process is the most important. Consult with your significant other and let them pick the final color.

Here you can see the gate after a couple coats of the selected color. At this time I had not applied a weatherproof topcoat.
I finished the gate with three coats of spar urethane varnish. I chose the finish because it offers a good level of UV and waterproofing protection.
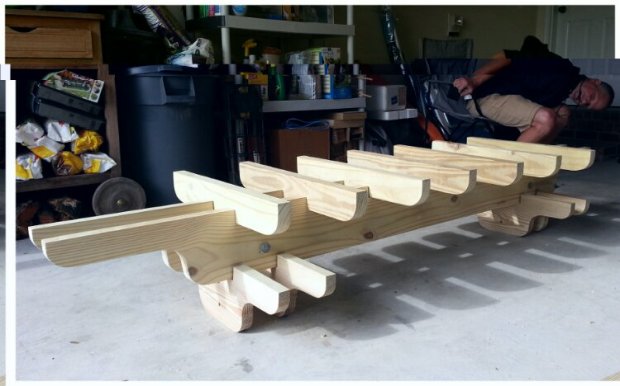
Before the gate could be hung, the arbor and fence needed to be built. Here you can see the top of the arbor assembled in the garage prior to installation.
There’s always some smart-ass in the background to check if your work is level and true.
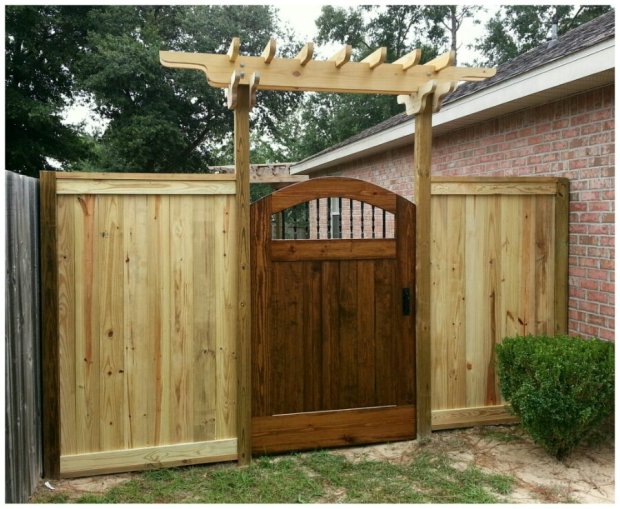
And here’s the finished product! Well, almost finished. After looking at this for a week we decided that the top was to high above the door. I removed the arbor and shortened the uprights by 10 inches. The gate looked proportional and better following this.
This project turned out a lot nicer than I had initially anticipated. On several occasions I’ve seen people stopped in front of the house pointing and have had a few inquiries about building one.


#1 by Tim on February 3, 2014 - 3:26 PM
Still doesn’t look level!