26″ Crescent Band Saw Base
Posted by Christopher in Projects, Tool Restorations, Workshop Design on November 10, 2014
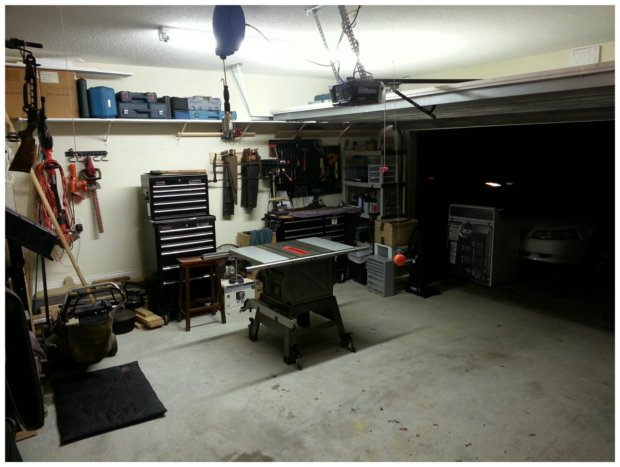
My current workshop is half of a two car garage that I share with my girlfriend’s beloved Mazda. With my recent slew of machinery purchases, space management has become quite important. Furniture dollies and casters are a blessing when shuffling equipment around.
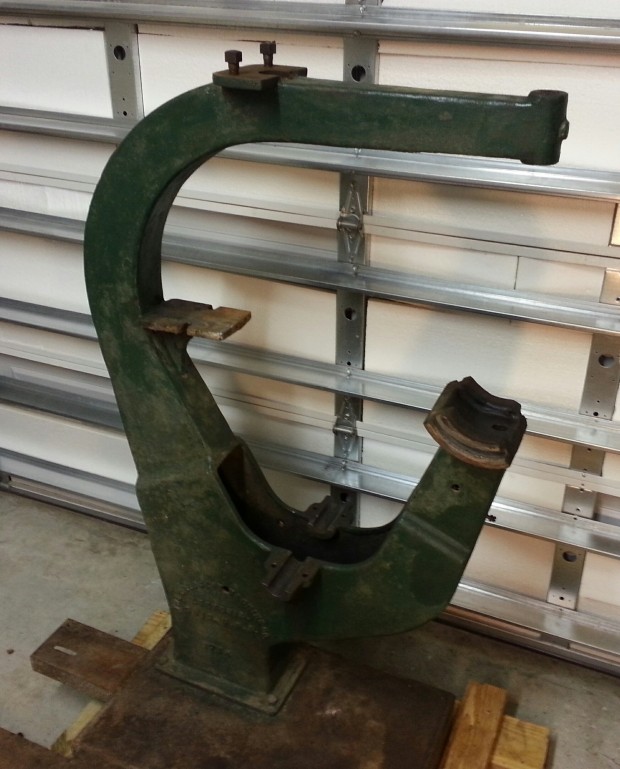
The base that the band saw came with is designed to be fastened to the floor and doesn’t lend itself to moving around a small shop easily. This is what I started with…
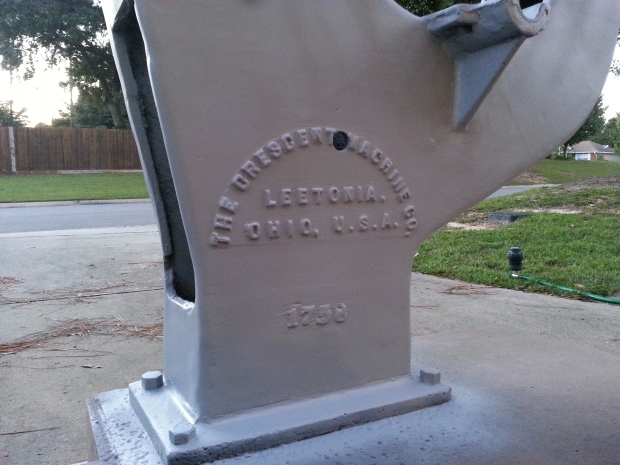
Whoever designed and built this base did a great job. As part of a Universal Woodworker, the saw was fastened to a large cast iron base that was about 6 inches tall. The base shown above mimics the original base.
The saw with a motor weighs somewhere in the neighborhood of 800 pounds. I need the cart to be strong enough to hold the saw and tall enough to position the table at a comfortable work height. Metal was the material of choice and after some research and a half dozen phone calls I found a local distributor.
I used a chop saw to make the first set of cuts, leaving extra length just in case things needed to be adjusted with the grinder. My experience with the chop saw was less than favourable. Luckily, David introduced me to a new friend of his who was kind enough to let me cut everything again using his horizontal band saw. The band saw produced a clean accurate edge which made welding everything together easier. David joined in with the welding.
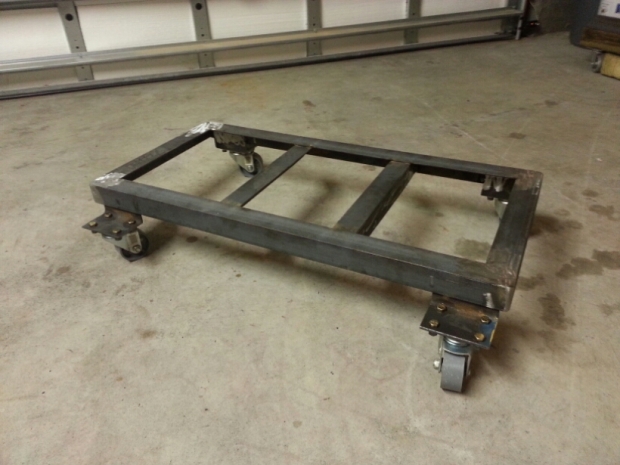
After a few hours of playing with the welder, this is what I had to show for it. The next thing that I did was to drill the holes for the 4 bolts that fasten the main casting to the cart. After that I ground away all of the unsightly slag, slapped on a coat of primer and then couple coats of black.
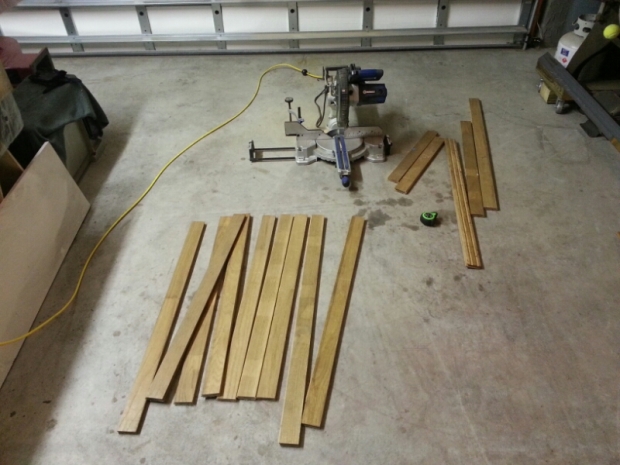
While the paint was drying, I started working on building a deck for the cart. David had a pile of reclaimed oak flooring that he was nice enough to let me pick through. I cut everything to a rough length and removed a few nails before gluing everything together.
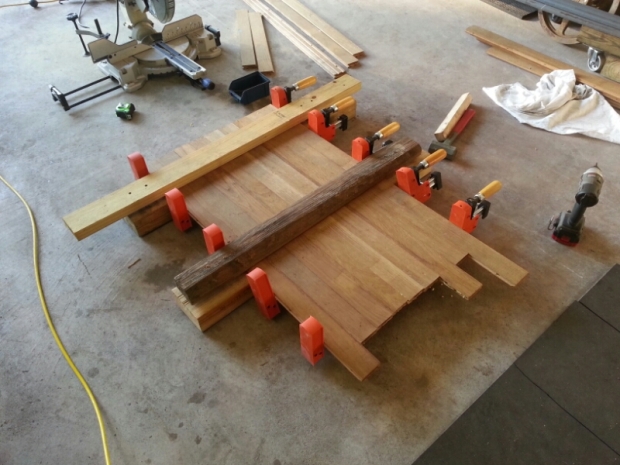
Here’s the deck glued and clamped up. I set this aside to dry for a couple days while I focused on dressing up the casters.
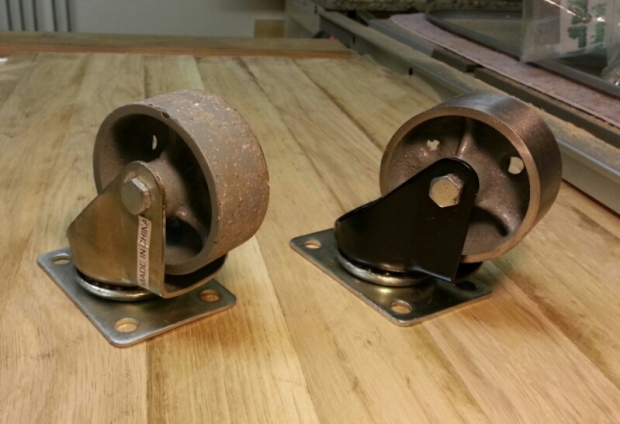
The casters I had on hang had been used previously to move the lathe. I disassembled them, painted the body, and cleaned the wheel up with a flap-wheel. Here’s a before and after.
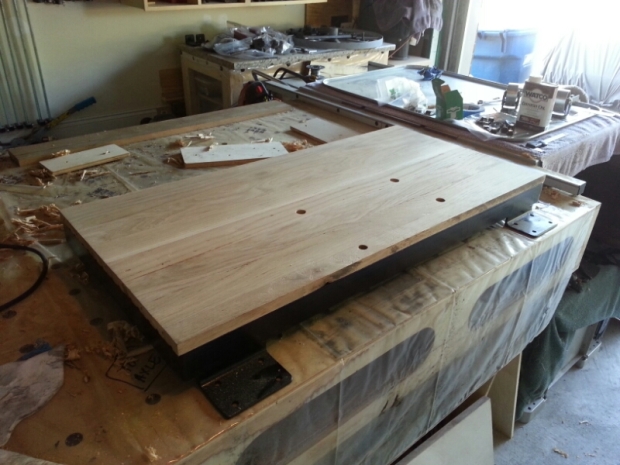
By the time that I’d finished the casters the oak deck was ready to be finished. I started by cutting it to size with the table saw and then working it with a couple hand planes until everything was smooth. Here it is fastened to the freshly painted frame.
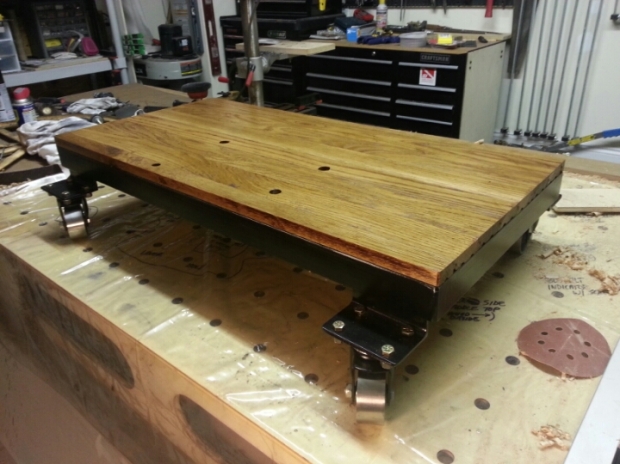
I applied a few coats of danish oil and attached the casters. Here’s the finished cart, ready to move the band saw around the shop.
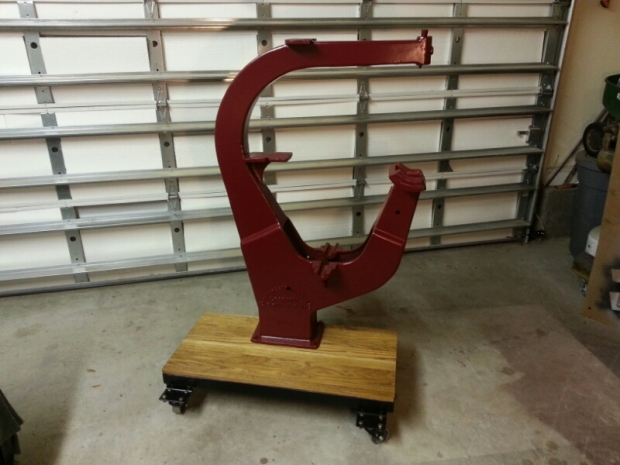
And here’s the frame mounted to the new base. It’s a big improvement over what I started with and will make life a little easier in my current workspace.
Next up I’m working on the upper wheel assembly and blade guide. Thanks for checking in on my progress and please let me know what you think.
26″ Crescent Band Saw Frame Restoration
Posted by Christopher in Projects, Tool Restorations on October 23, 2014
A few days ago I took the band saw apart and meticulously documented and photographed the disassembly. Hopefully I took enough pictures…
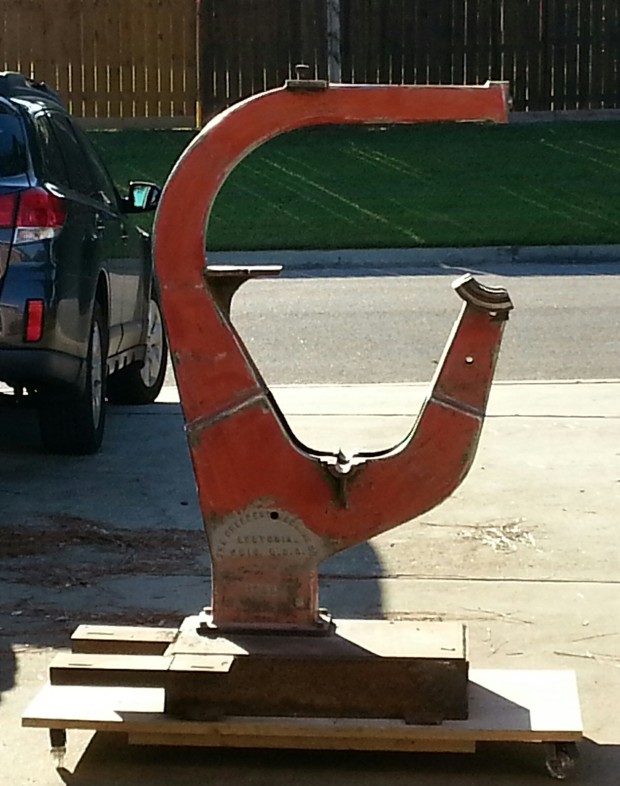
Now it’s time to start working on removing the John Deere green and applying something a little less “farm”. Don’t get me wrong, I like the green and yellow color scheme but it belongs on two things; tractors and implements. My plan of attack for the band saw is to start with the frame and then simply add components as I complete them. Here’s what I started with:
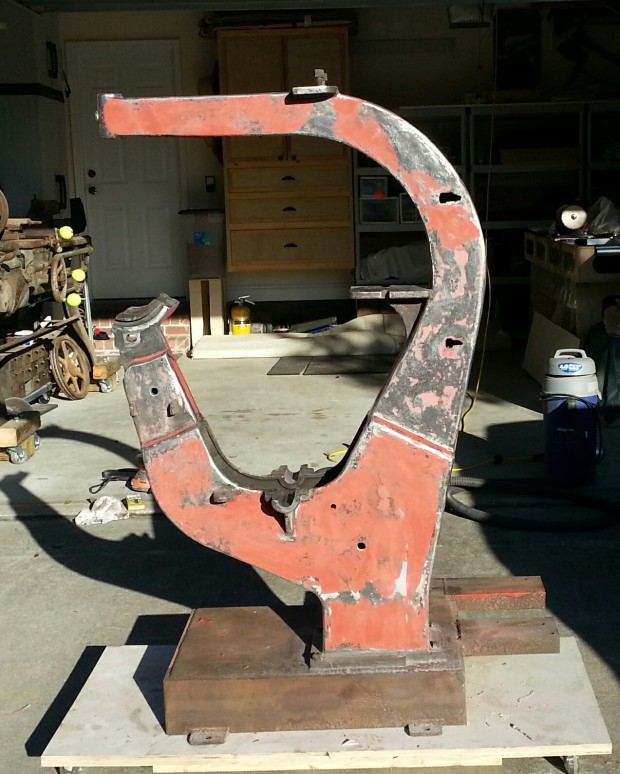
From what I could tell, the green was just spray painted over the original flat black. I took the frame outside to avoid filling the garage with lead based paint dust. You should assume that all old machinery is painted with lead paint and take precaution against inhaling it. I wore a commercial grade respirator, safety glasses and gloves. Using a wire and abrasive flap wheel on a 4-1\2″ grinder, I was able to strip the frame down to bare metal in just over an hour.
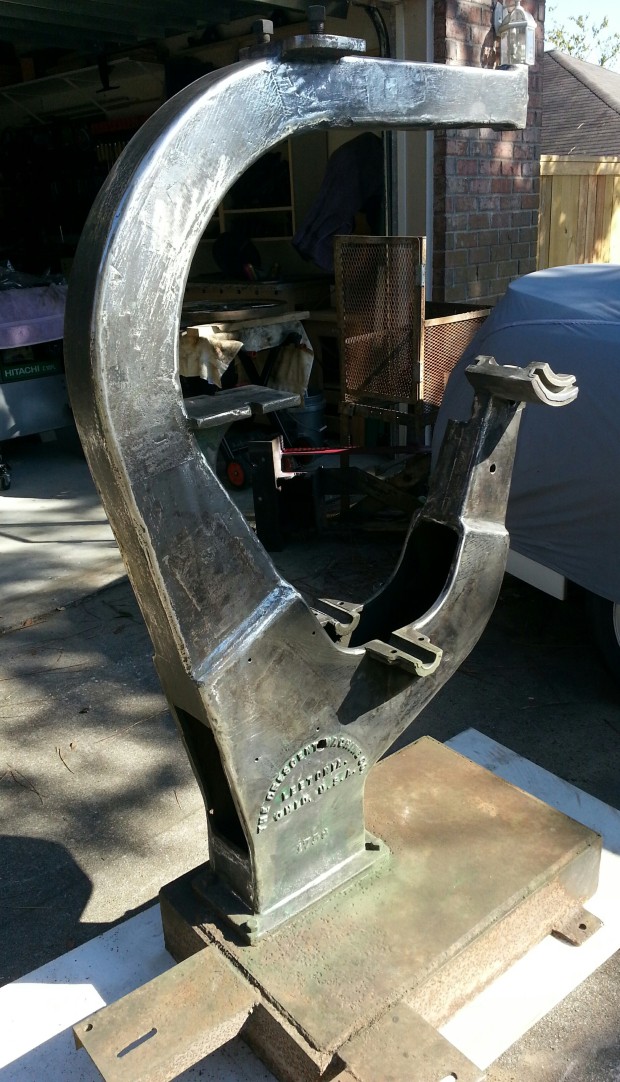
With the frame stripped, you could see and feel the texture of the casting. It was rougher than I anticipated. In order to smooth everything out a bit I applied a couple coats of body filler.
Once the filler had dried thoroughly, I sanded everything back to bare metal again using a flat block and 120 grit paper. In the next picture I’ve started sanding the frame and you can see how filler is left behind in the low spots. I did this two times before moving to the next step.
Once I was satisfied with the smoothness of the frame everything was wiped down with acetone in preparation for priming. Blue painter’s tape was applied over all of the babbitt bearings. I used Rustoleum professional duty grey primer. I applied thee coats, starting with a very light coat and got progressively heavier each time. The frame looked really good in grey.
The primer allowed me to see how the body filler worked on the frame. The result I was aiming for was smooth but not perfect. You can still see the major casting and assembly lines used in the manufacturing process.
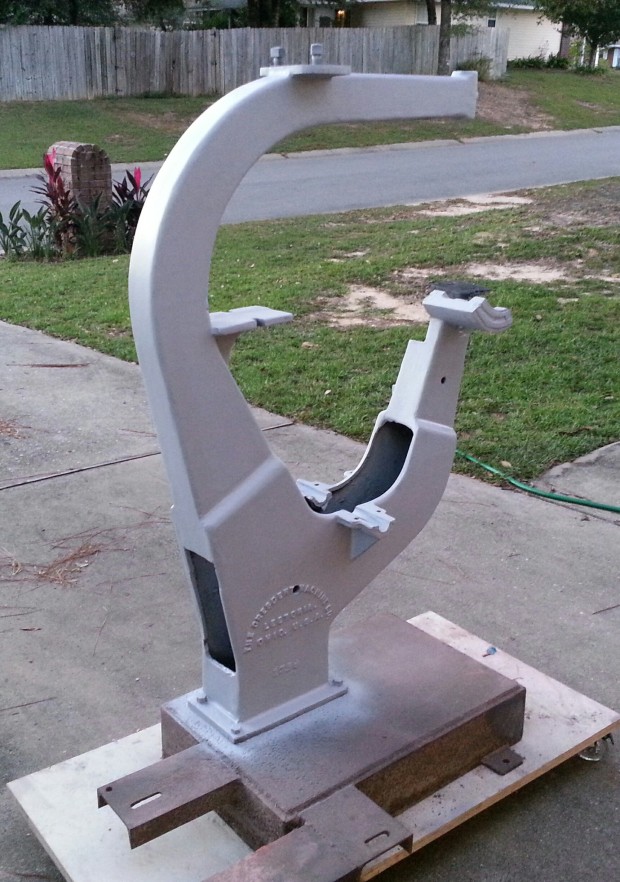
After the primer had dried for several hours I applied the top coat. I used Rustoleum enamel spray paint in a satin finish, applying several coats using the same method as with the primer. Each coat was applied heavier than the previous and about ten minutes apart.
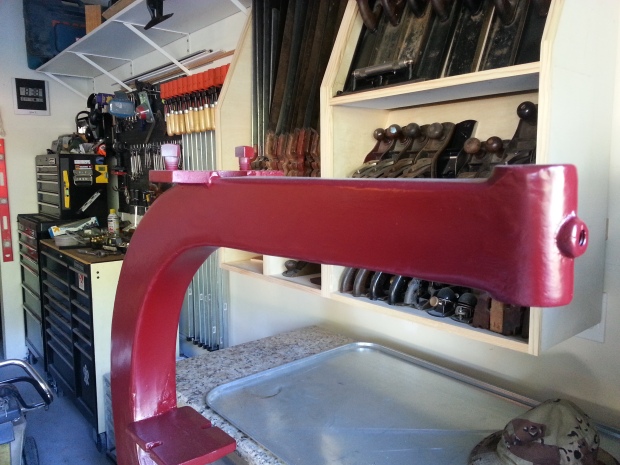
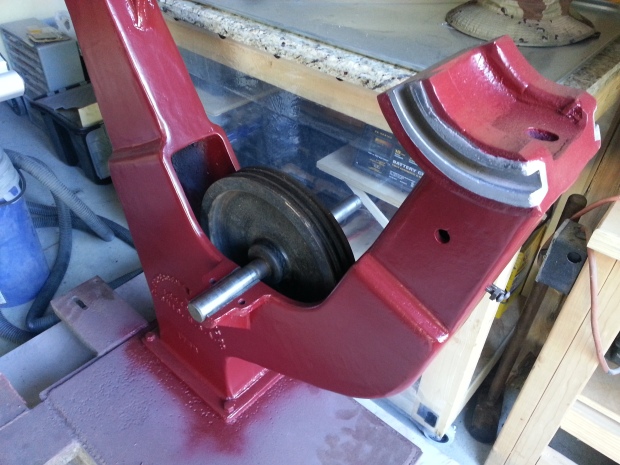
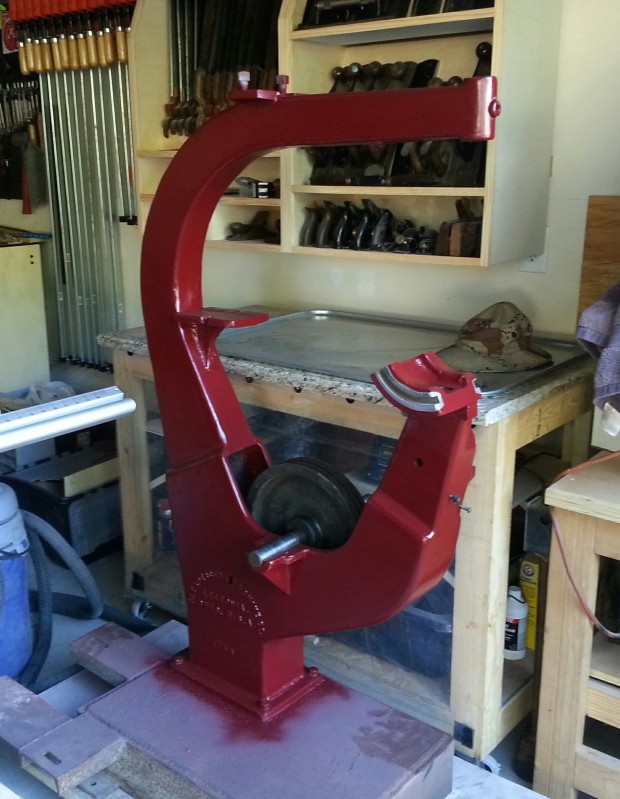
The paint color is “chardonnay” and turned out really nice. It’s not perfect but hopefully it’ll provide enough protection to keep this saw running for another 80+ years. Over the next few days, the paint darkened nicely to what you see in the following picture.
I’ve already started cleaning and painting components for the upper assembly but next I’ll be fabricating a new base for the saw and motor assembly.
Thanks for stopping by and please let me know if you have any thoughts or questions. Till next time…
26″ Crescent Band Saw Tear Down
Posted by Christopher in Projects, Tool Restorations on October 13, 2014
The band saw has been sitting patiently in the corner of the garage since sometime in June. I promised to get a few projects completed before starting any work on the saw.
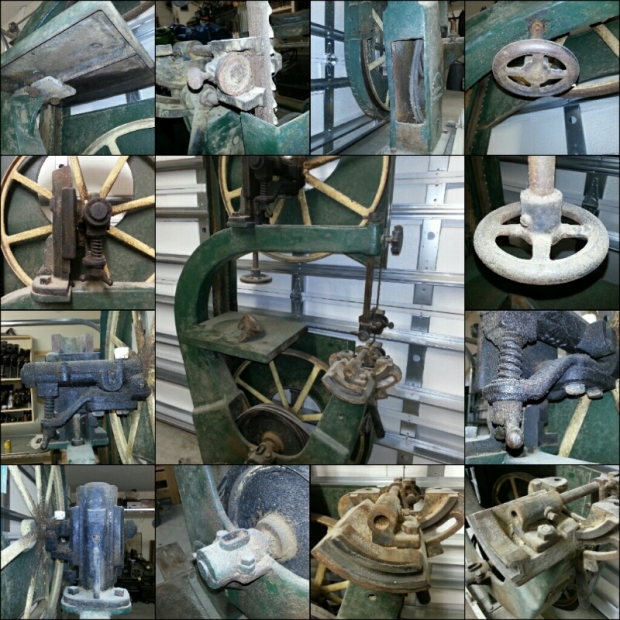
Last week I finally finished the last project on my honey-do list and was able to start the refurbishment. This first thing I did was take pictures. Lots and lots of pictures of every part from multiple angles. I’ll be using these to make sure that things go back together properly.
I’ve done a fair amount of research and to the best of my knowledge, Crescent Machine Co. didn’t make saws with big OSHA style blade guards until they were purchase in1945 by Pittsburgh Equitable Meter and Manufacturing Company, which later became the Rockwell Manufacturing Company. The guard on my saw don’t look to bad but aren’t original and because of that I’m going to remove them permanently.
Lucky for me, whoever modified the blade guards used the original mounts. This is going to save me some grief when it comes time to make blade guards similar to those that came on the saw.
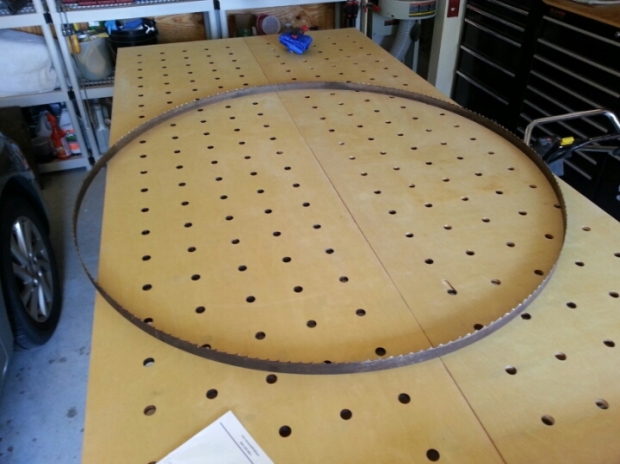
Taking the saw apart was pretty straight forward. I removed the blade first. My workbench is 46″ wide. I attempted to fold the blade up neatly but almost decapitated myself. After some practise with one of my smaller band saw blades and a pair of gloves I was successful.
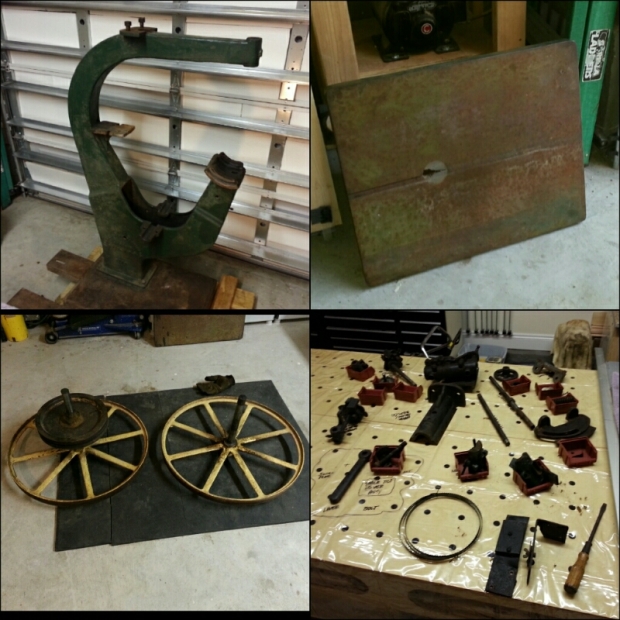
Once the blade of death was out of the way, the rest of the saw came apart very quickly. I was able to tear it down to the frame while taking pictures and notes in an hour and a half. Here’s the saw completely tore down.
My plan is to start with the frame and then add to it as I work through each of the individual parts. This will hopefully free up room in the garage as the project progresses.
Stay tuned for the next update!
Crescent Machine Co. 26″ Band Saw
Posted by Christopher in Projects, Tool Restorations on October 12, 2014
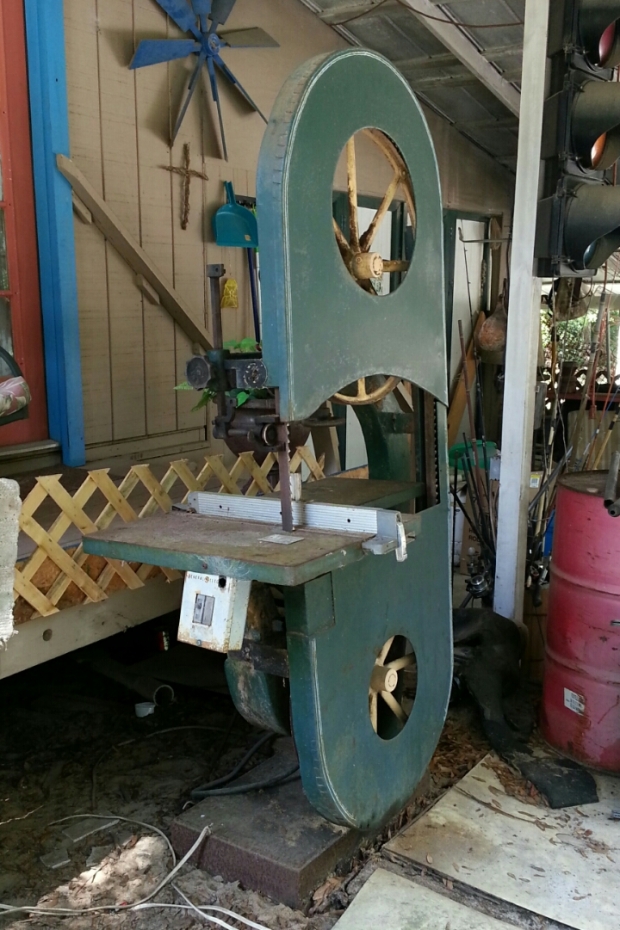
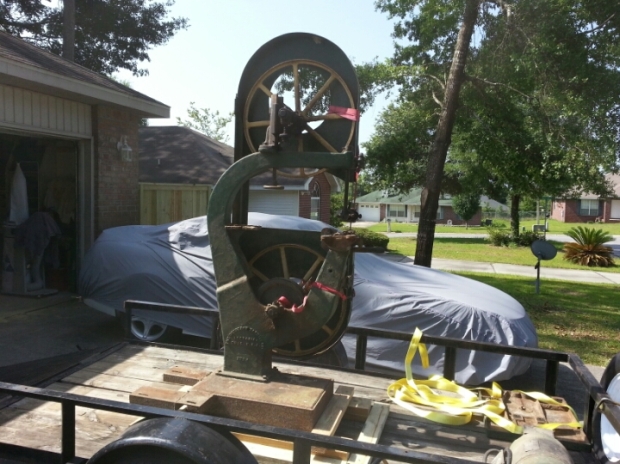
Earlier this summer while looking through the local Craigslist adds I happened upon a posting for a large band saw. There was no picture and the description didn’t mention a name brand or any specifics. The saw was about 15 miles away and out of curiosity I contacted the owner and made plans to see it. I called David and off we went. This is what we found…
I wasn’t expecting this at all. I thought it was going to be a big Delta or Rockwell and was pleasantly surprised to discover a 26″ Crescent Machine Co. band saw.
We looked over the saw, and after some haggling settled on a price.
Here she is, securely loaded onto a trailer. We removed the tables and motor to make it easier to move. You can see the main table in the upper right corner of the trailer and the 3hp motor below it. I built a wooden base/pallet to increase the stability and help in moving on and off the trailer. The base had tabs for fastening the saw to a floor. I used lag bolts to secure the saw to the wooden base. Using 3/4″ PVC pipe, we rolled the saw down the trailers ramp and into the garage.
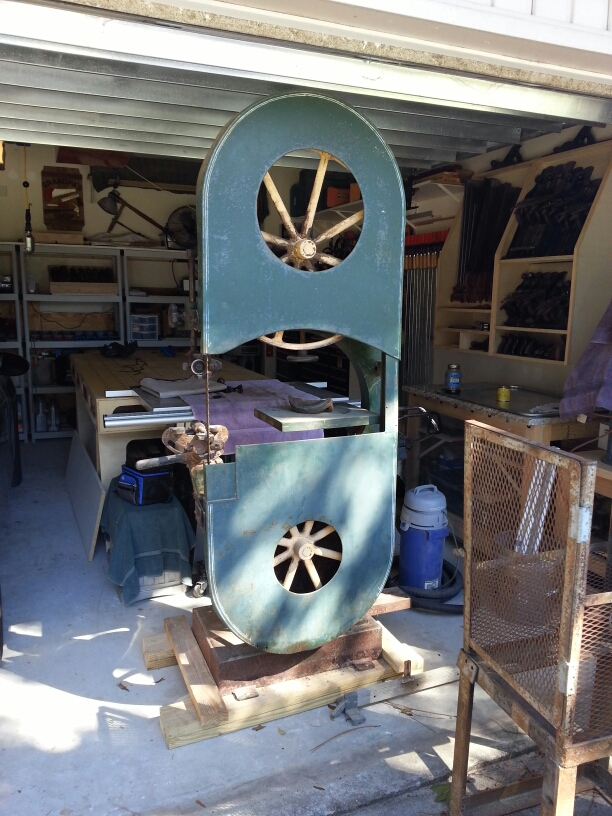
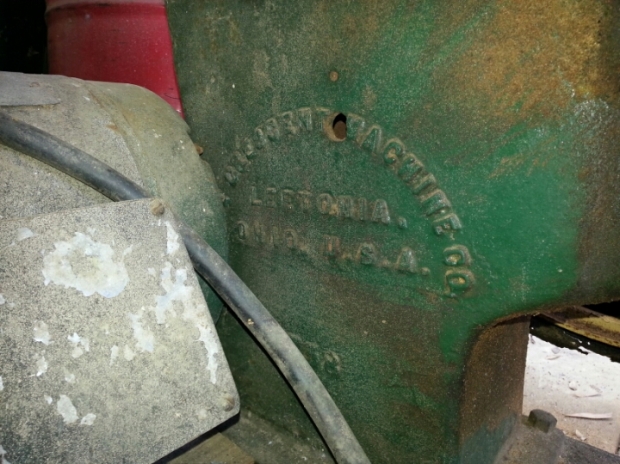
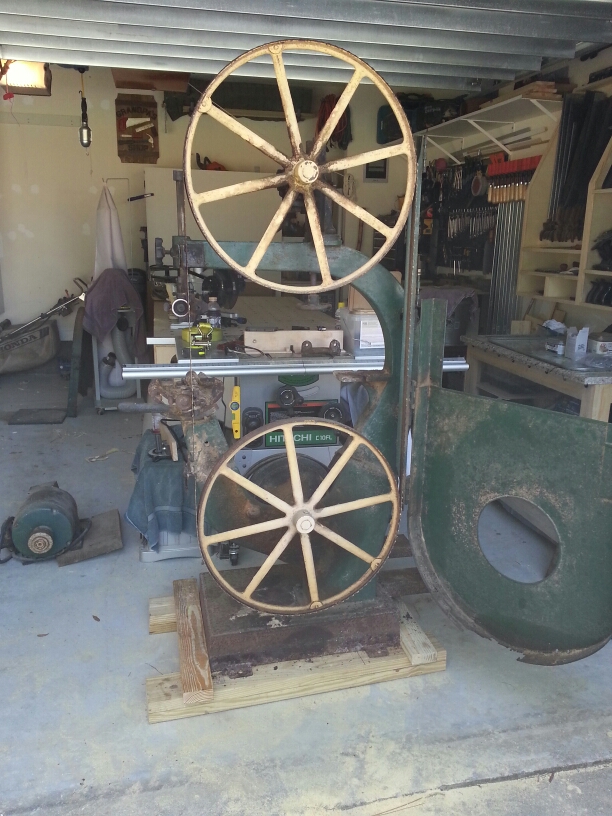
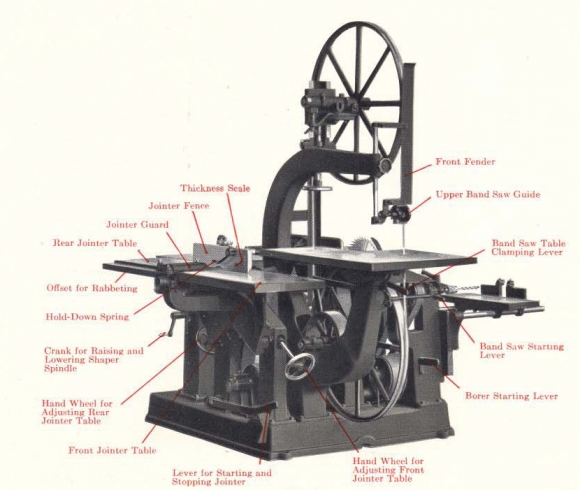
We had to remove the top blade cover to fit into the garage. Everything looks and feels great. The wheels turn freely and all of the adjustments work without any apparent issues. If you’re familiar with Crescent’s line of machinery, you’ve probably noticed that this saw is different from their standard band saw. Crescent manufactured a piece of machinery called the “Universal Woodworker” which contained an arbor saw, jointer, shaper and band saw all attached to a single base. Is quite an impressive piece of machinery as you can see in the image below. Everything ran on one motor and each station could be operated simultaneously. My band saw was originally part of an Universal Woodworker.
I couldn’t locate a serial number and probably never will because Crescent signed a single number to a Universal Woodworker which was typically stamped onto the arbor saw’s table. And because Crescent didn’t change many features on their band saws over the years it has been difficult to establish how old the saw is. I’ve looked through old catalogs online and the best I’ve come up with is somewhere between 1915 and 1930.
So what am I going to do with a 26″ band saw? Use it of course… But first I’m going to take her apart, clean everything up and restore her. Check back to see my progress and the finished product.
So Many Planes
Posted by Christopher in Projects, Workshop Design on April 24, 2014
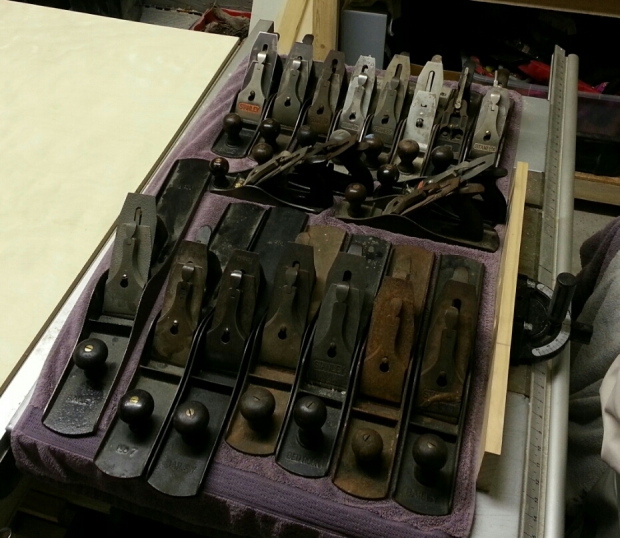
I’ve been collecting vintage tools for a couple years now, focusing mainly on Henry Disston handsaws and Stanley bench planes. I usually find at least one tool every time I venture out to a flea market, estate sale, or antique shop. These tools have been piling up in plastic bins and on shelves in the garage. A few months ago I took a quick inventory and realized that I had enough bench planes to open a Duncan Phyfe furniture factory.
Most of these are in a queue to be taken apart, cleaned, and tuned for use. The rest are in good shape and used regularly. The No.5’s have gotten out of hand. I’m embarrassed to admit that I have 11 Stanley’s and 1 Keen Kutter-K5. I need to thin the fleet out soon to make room something more useful like the elusive No. 4-1\2 or an overpriced No. 2.
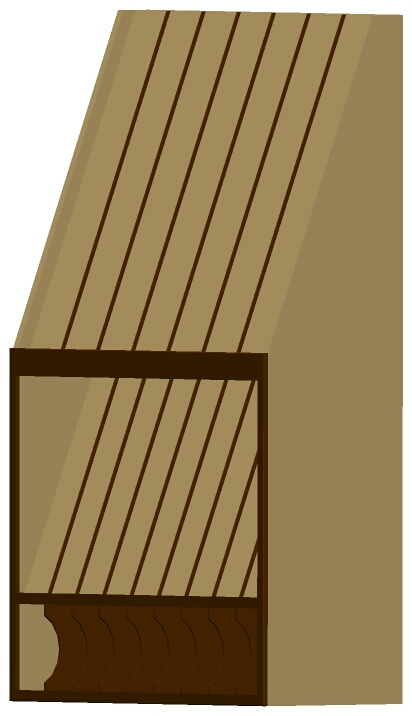
I’ve been planning to build a row of cabinets to hold my woodworking tools since I moved in last year. I have a vision of a saw and plane till sharing the same profile so that when installed look like one big cabinet. I read through woodworking forums for a couple hours researching common designs, measured a few tools and started playing with CAD software. This is what I came up with.
There’s room for 25 planes! Nobody really needs more than 5 bench planes, let alone duplicates. This till is going to allow me to see what I have, access them easily, and provide a visual reminder to choose wisely when out and about picking (my girlfriend may beat me with the next No.5 I let follow me home).
I used cabinet grade 1/2 inch pine plywood and plan to trim it out with premium quality pine lumber. Please don’t judge me for using pine. I’d rather build my tool cabinets with a quality hardwood like oak or walnut but this would take selling a kidney on the black market. The pine is nicer than I anticipated.
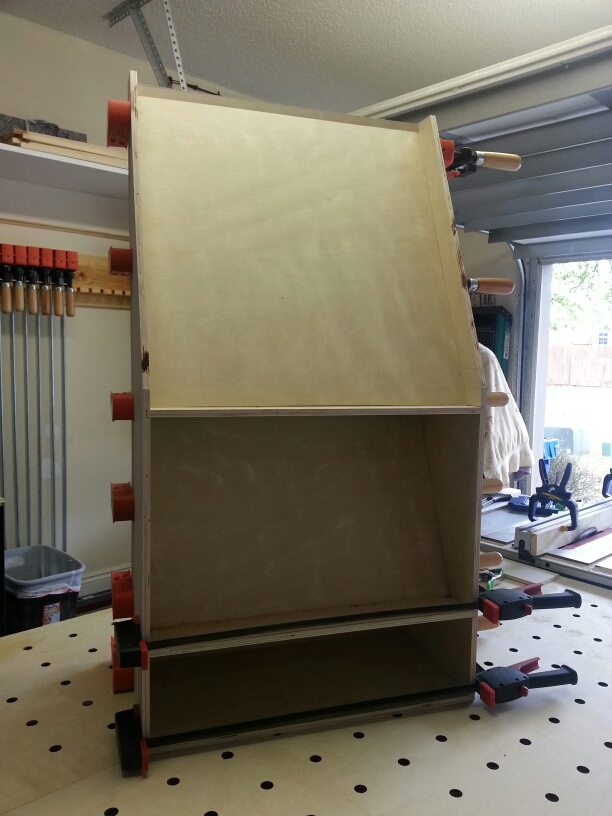
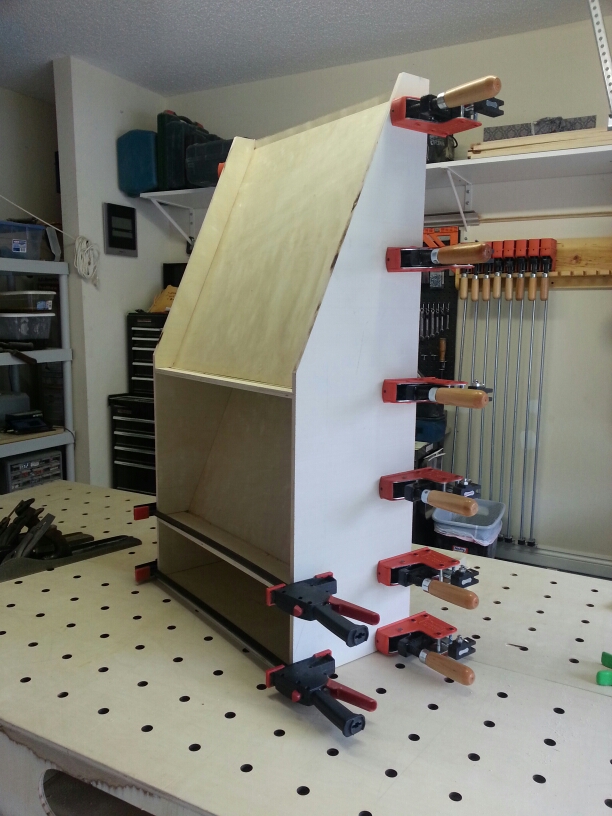
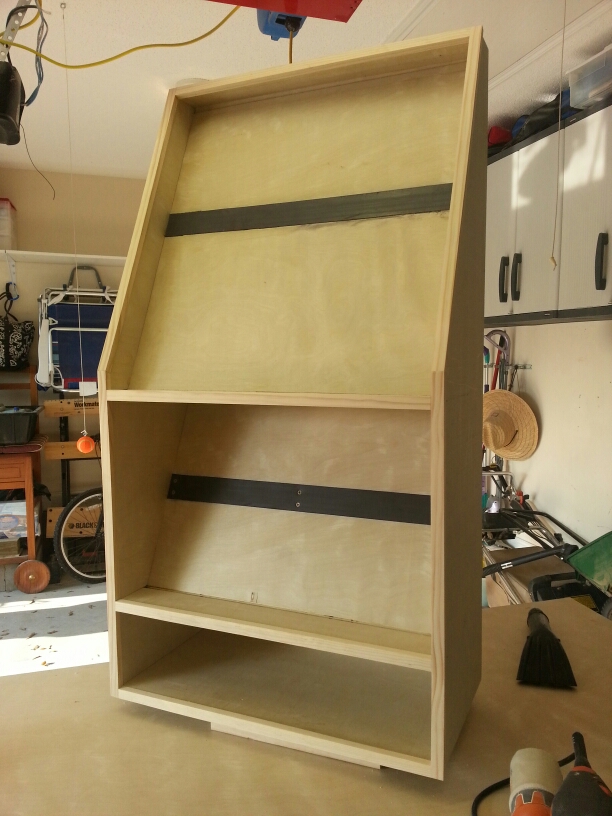
I ripped and cut everything down to size using my table saw. The dados and rabbets where fabricated using my router with a 1/2 inch straight bit. Once I got the depth set at a 1/4 inch and then used a circular saw straight edge and a few clamps to hold it in place. Using the router kept me from having to get the dado set out every time I forgot to cut something.
I assembled all joints with wood glue and then used finish nails from the outside. This kept the surface that you can see nice and clean. It’s a good idea to go through a couple dry assemblies before applying glue. This will insure that you don’t have any unexpected surprises once the glue is dripping everywhere. Also, I like to sand all of the pieces before assembly to remove pencil marks.
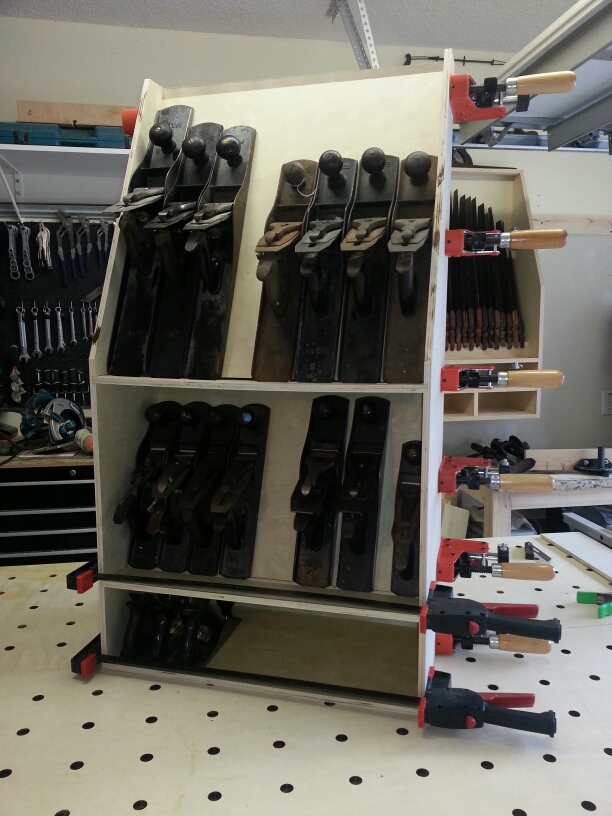
I loaded up a few of the planes to see how they looked in the till. The angle of the plane shelf is 23.5 degrees and was chosen because I thought the planes would sit on the shelf without falling. The planes seemed to be pretty stable but I wanted a little insurance that they wouldn’t slide to the side and fall off the till.
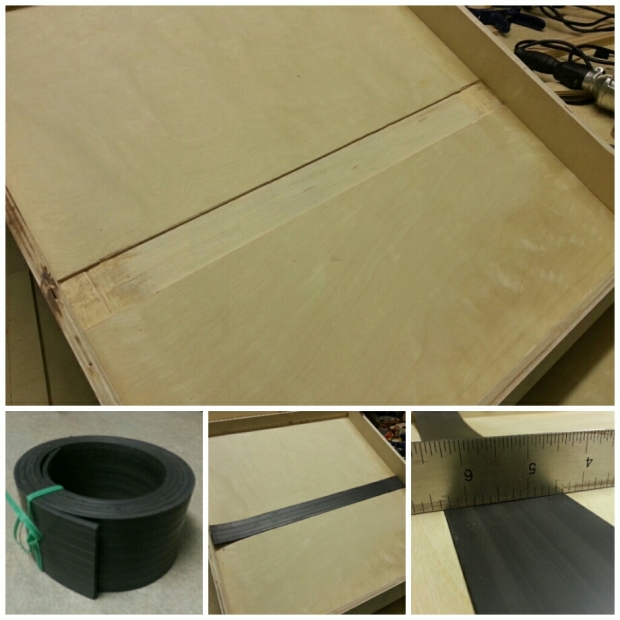
I ordered 5 feet of flexible magnet from McMaster-Carr. The magnet is 2 inches wide , 1/8 inch thick and has a 34 lb per foot holding strength. It was installed by cutting out a 2 x 1/8 inch groove from both shelves in order to flush mount it. As you can see from the bottom right picture in the collage, it worked out nicely.
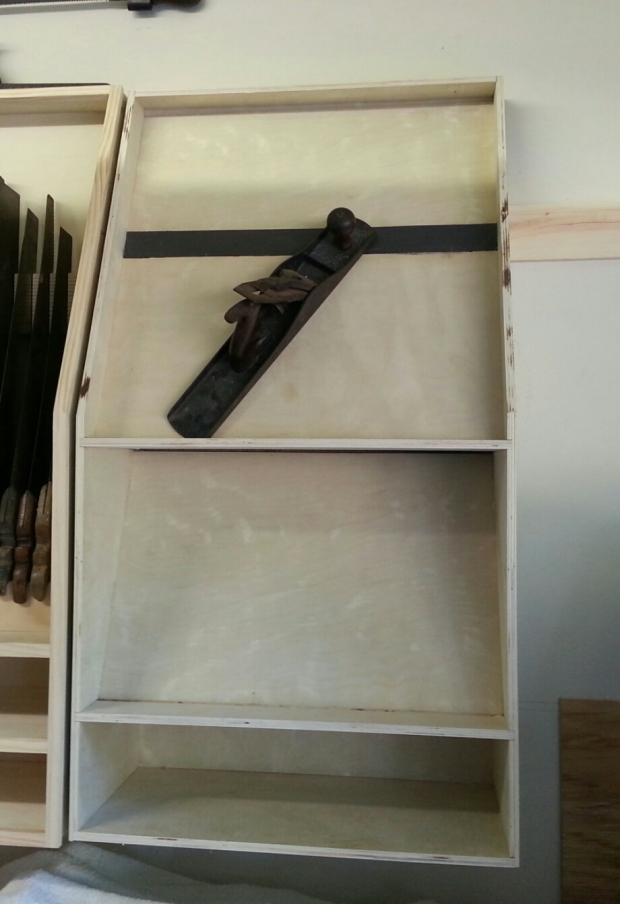
Here you can see a Stanley No.6 at about 50 degrees. The magnet isn’t going to lock the plane in place but it’ll provide enough hold to keep it from sliding sideways and falling to the floor. I’ve actually had nightmares about this and have woke at 3AM to check on the planes. So far, I’ve not had any surprises!
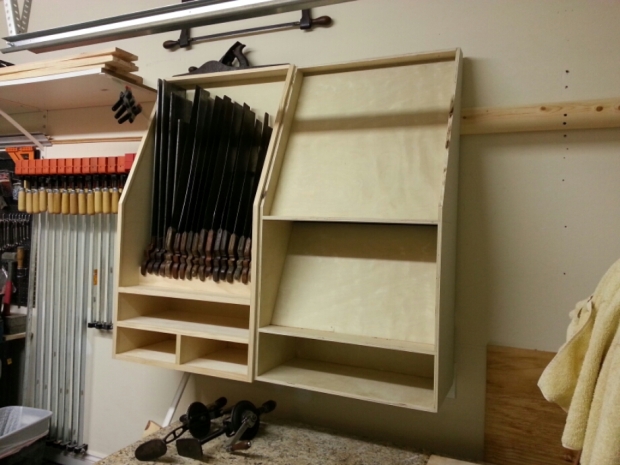
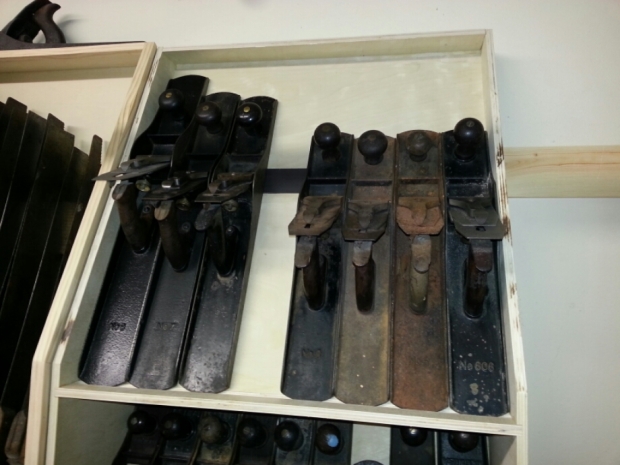
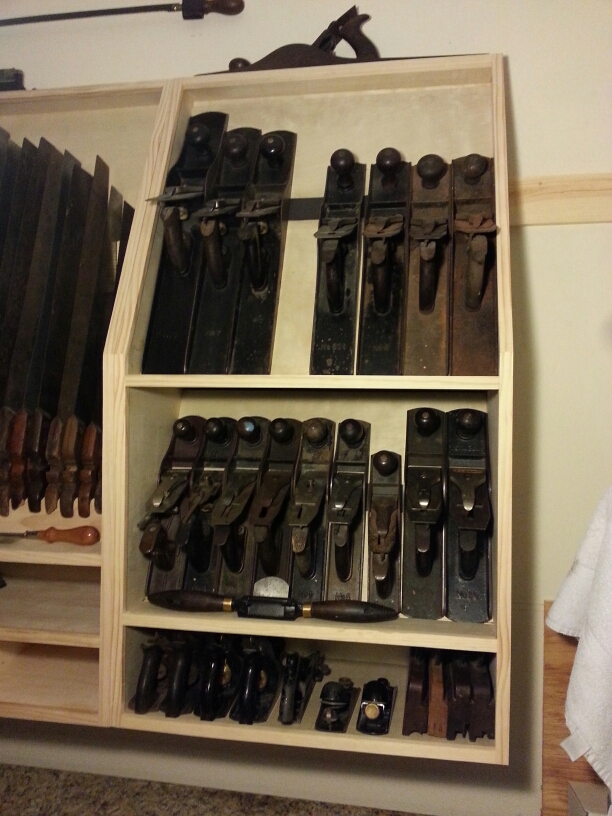
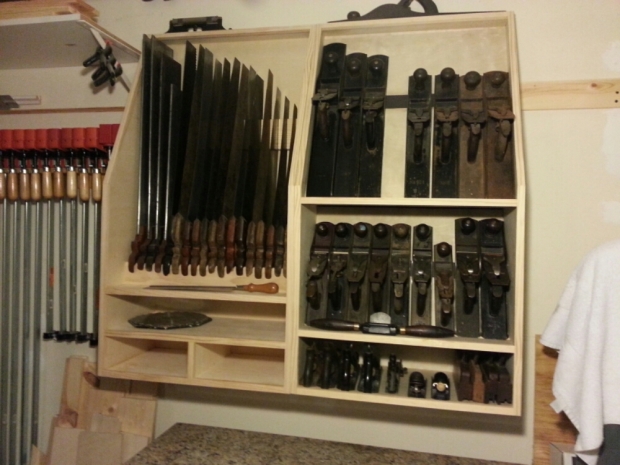
I mounted the till on the wall using a French cleat. Here you can see it next to my saw till (SPOILER! Look for an upcoming post).
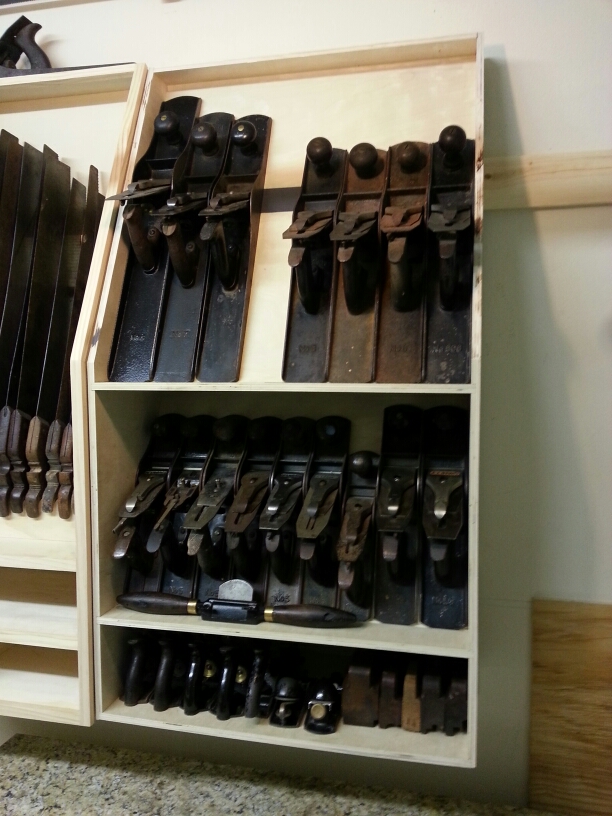
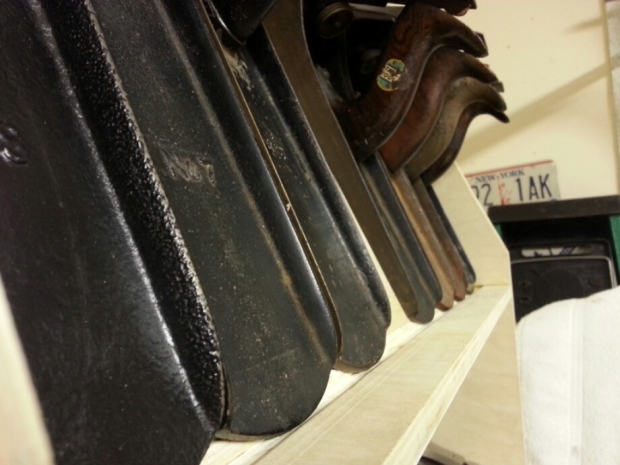
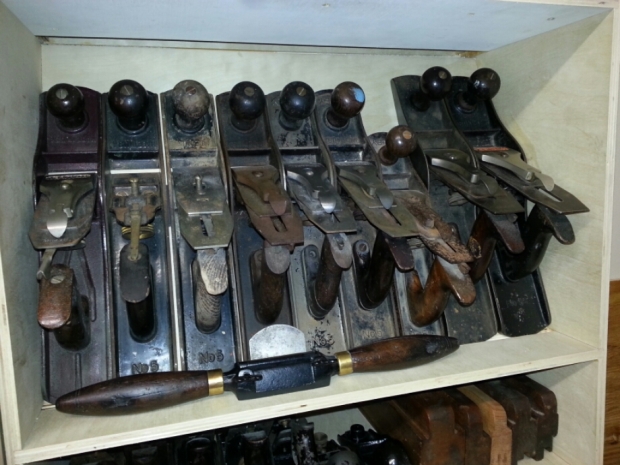
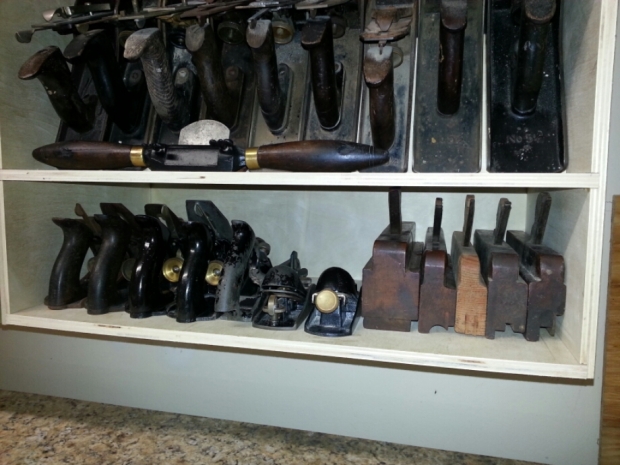
Once the glue for the magnetic strips dried, I hung the cabinet and loaded it with my collection of bench planes.
This weekend I’m going to trim the cabinet and begin work on the next project. Check back for a few pictures of the finished till, and please let me know what you think and if you have any questions.
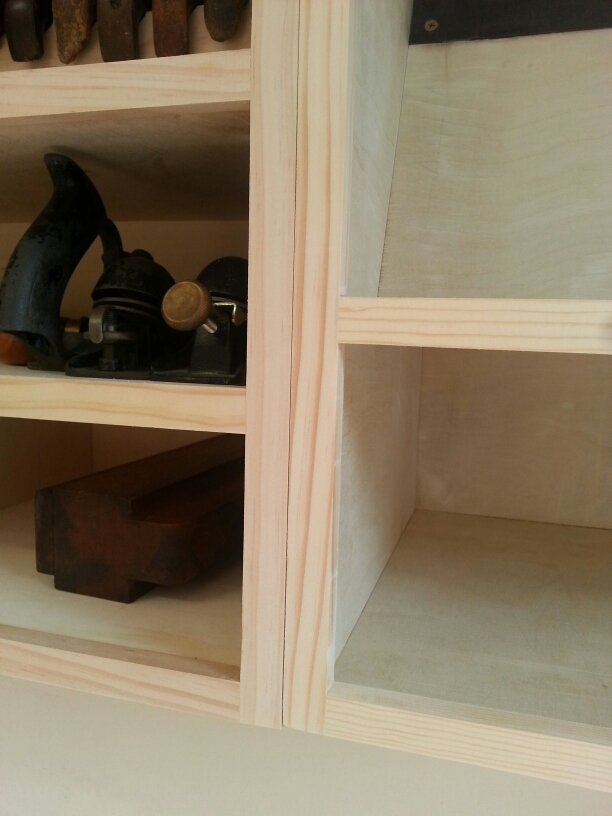
Update… Trim was installed this weekend.
The Ultimate Workbench…
Posted by Christopher in Projects, Workshop Design on April 22, 2014
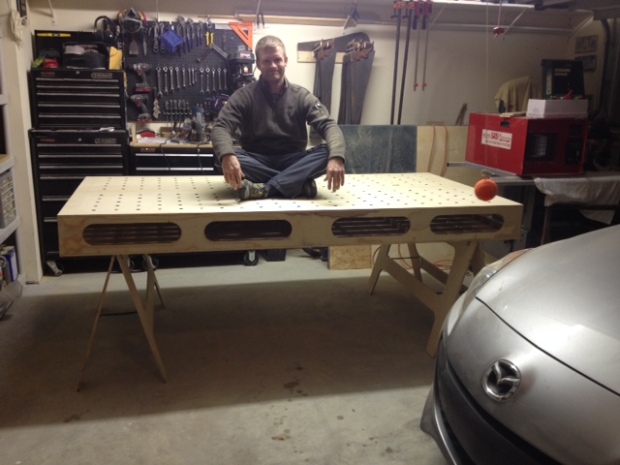
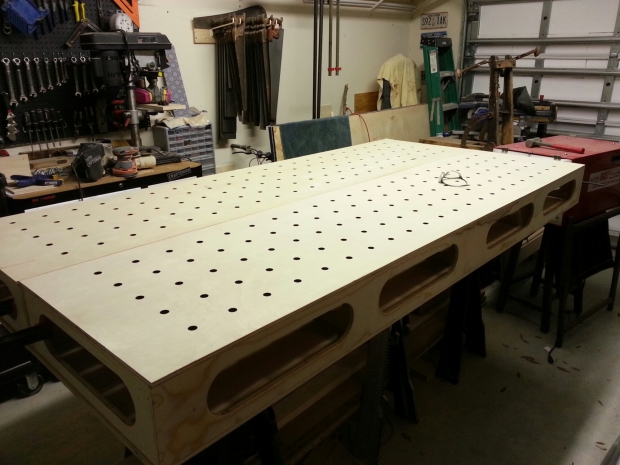
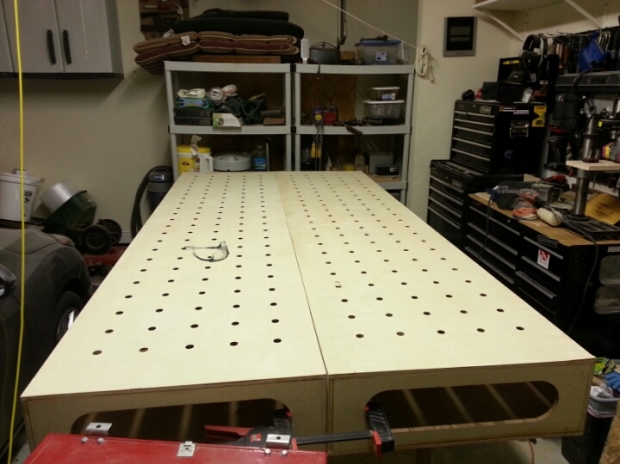
A while back (OK, it was forever ago), I wrote a quick post on upgrading the lighting in the garage and indicated that in the next few months I would be building a workbench. Well, I finally got around to building one and this is what I ended up with.
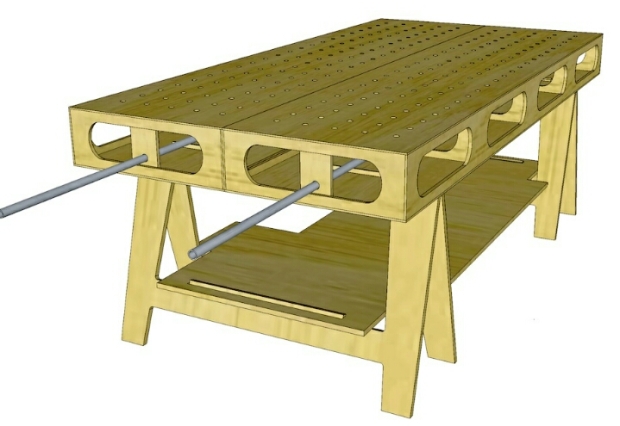
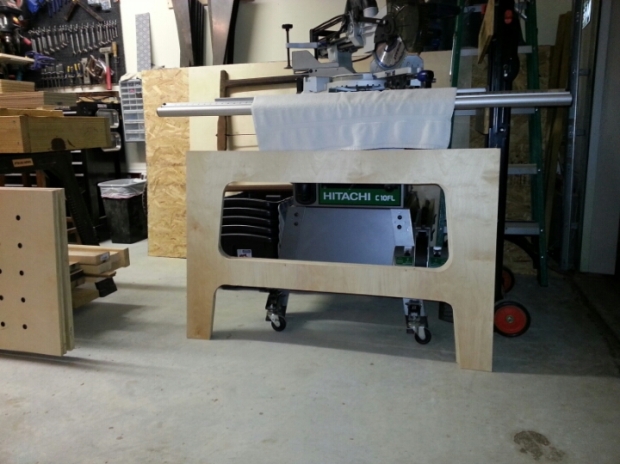
A lot of thought and design consideration went into selecting a workbench. Weeks, maybe months (I can be dramatic) went into researching and trying to figure out how I could fit a good size workbench into half of a two car garage. In my research I came across every type of workbench possible, some simple and many very intricate. I saw a very popular workbench called “The Ultimate Workbench” designed by Ron Paulk. I spent a few hours reverse engineering his bench from the published specifications in a CAD program, but in the end, curiosity about how my design differed from his drove me to paying $10 for the plans. It was nice to know that my plans matched Ron’s in every dimension except for the oval cut-outs on the sides. The plans are well worth the money and cover everything in great detail (There’s even schematics for a router fence included). Ron even has a series of YouTube videos where he goes through the fabrication step by step. It’s helpful for those of us that get frustrated with schematics.
So why did I choose to build this workbench when my woodworking interest is in vintage hand tools? The ultimate workbench appealed to me for a few reasons; it’s modular and could be broken down for transport and storage out of the way, it’s very versatile with plenty of room for clamping and tool storage, and finally it just looked cool.
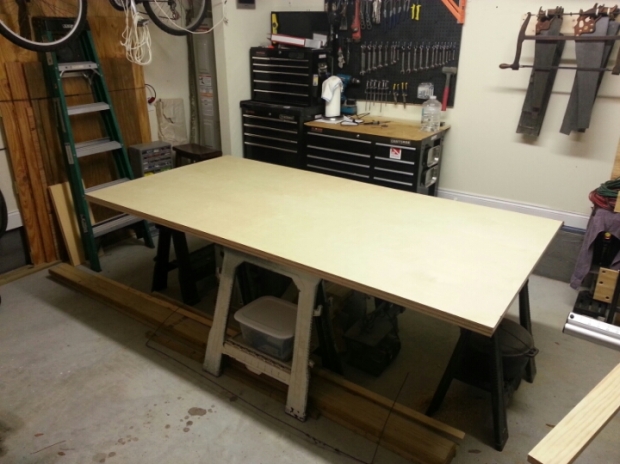
Having access to a router and table saw makes the build a lot easier. The only real issue that I had was that it really requires a workbench to build a workbench. Luckily for me I had a few cheap saw horses and a couple 2×6’s leftover from a previous project. It wasn’t ideal but it worked. Other than that, the build went very smoothly.
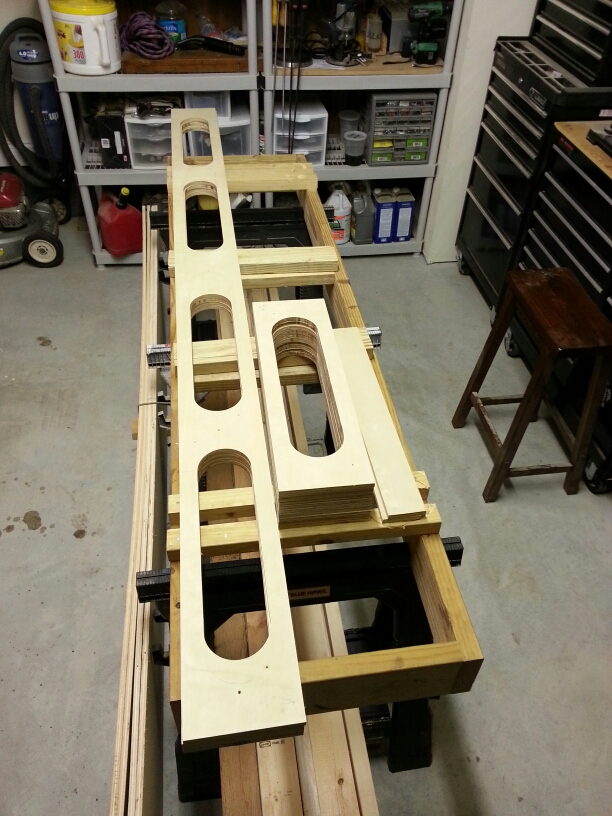
Measure twice, maybe three times and don’t rush with the first piece of each section. These pieces are used as a templates for the rest and makes for a very quick fabrication when done correctly. In the first evening I was able to rip and cut everything to length. The following day I laid out and cut the openings in one of the rails and cross pieces. This was a long evening and the most frustrating part of the build. The next session was very simple and I was able to cut out all of the openings and finish one leg to the saw horses.
Wait a second, I just remembered that the most frustrating part of the build was drilling 10,000 (dramatic) pocket screw holes. I don’t remember the exact number but I wore my little Kreg pocket screw jig out in the process.
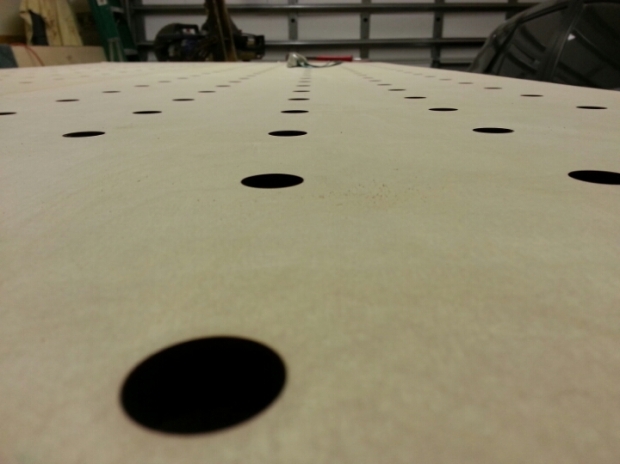
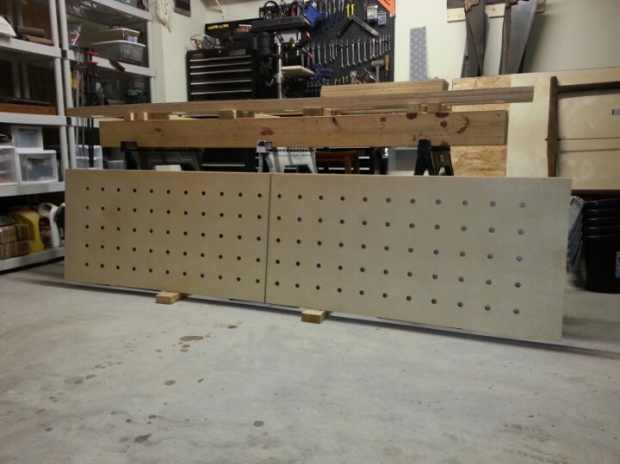
Have you ever wondered how straight you could drill a line of 3/4 inch holes? Me either, but the next step in the build is going to help you with the answer to this question.
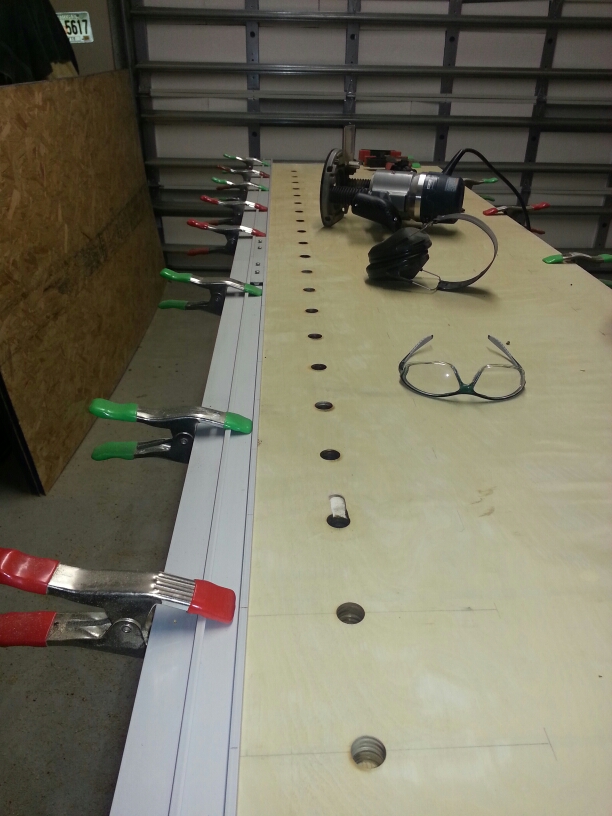
Line number one done! Looks pretty good huh? Ignore the third hole! That's what happens when you get in a hurry
I used a straight edge to line everything up. It’s a store bought circular saw guide for cutting sheets of plywood. Using a pencil, I made a mark every four inches on the guide that I could line up with a mark on my router. This way, you only have to position the straight edge for each row. Measure the diameter of your router base twice and make sure to divide it by two when positioning the straight edge. Figuring this out made drilling all of these holes rather easy.
The final step in the fabrication was fastening all of the parts together. I used glue, clamped everything together before fastening with screws. The finished product is pretty impressive. The workbench is stable and very strong, but light weight enough to be moved around and assembled by one person.
For the table, I chose to use a nicer cabinet grade 1/2 inch plywood. The total cost, including screws, a router bit and two clamps was $180. There are some upgrades that I have planned for the table. I plan to fabricate brackets that’ll allow me to use bench dogs for plane-ing and a carpenters vice to help with cutting tenons and dovetails.
I’ve been using the workbench for a few months and all I can say is awesome! It’s great for layout, fabrication, assembly and finishing. I would recommend it to anyone who’s looking for a good all around work station. It’s not the last workbench I’ll ever build, but it’s one that’s going to come in handy for years to come.
Let me know what you guys think and hit me up if you’ve got questions. I’ll be happy to help.
Arbor Gate build…
Posted by Christopher in Home Improvements, Landscaping, Projects on February 2, 2014
Last spring while working in the yard, my girlfriend and I were discussing what to do with the yard in order to develop a more usable space for relaxing and entertaining friends and family. The side of the house was basically unused without a gate. In discussing it, my girlfriend mentioned that an arbor entry gate would be nice. The natural order of things following a discussion like this is for me to start researching and to completely immerse myself in arbor and gate design. And that’s what I did…
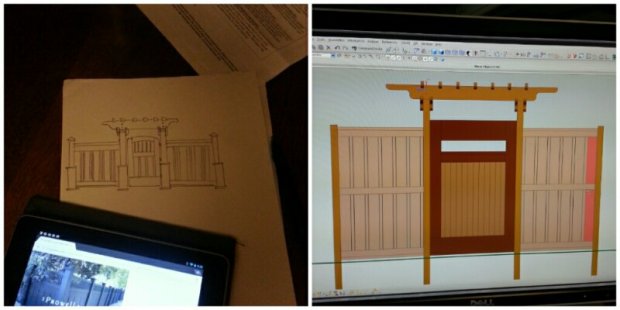
After a few sketches and some back and forth with my old lady, we decided on a particular style.
Once again, I leaned on my friend David for some assistance in the construction and fabrication. The workshop should look familiar if you follow his blog.
Treated lumber is made by saturating the wood with a water based chemical that slows rotting and prevents insects from moving in. This material often arrives at the store still wet and will twist and warp as it dries. I chose to use untreated pine lumber because it has been kiln dried which will prevent a lot of the twisting and warping that occurs when wood acclimate to its environment. Special care is needed to seal the lumber in order to prevent rotting. I’ll discuss this later.
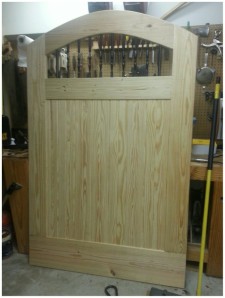
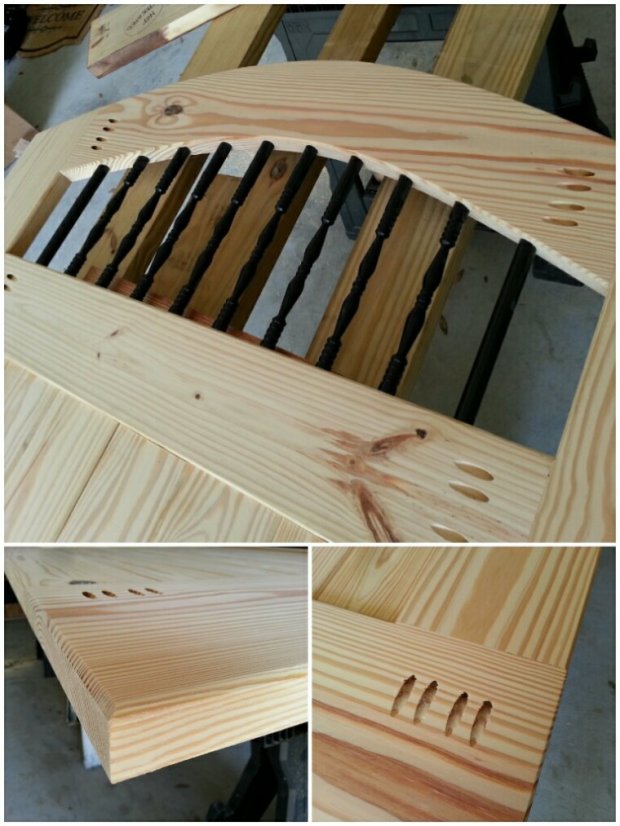
As you can see, the design changed from the screen shot shown above. The top of the gate was rounded. The speak easy was constructed using black powder coated aluminum rail bars taken from a kit sold in the deck and lumber section of a big box lumber store. The bars were cut down to size and press fit into the gate.
Once the gate was built, it was time to apply the finish and weather proofing. Not sure of the desired color, I set up a test board using scrap from the gates construction. I sanded the board with the same schedule that I used on the actual gate. Once over with 80 grit and a final pass with 180 grit. I then applied several stain colors and let them dry. The next step in the color selection process is the most important. Consult with your significant other and let them pick the final color.
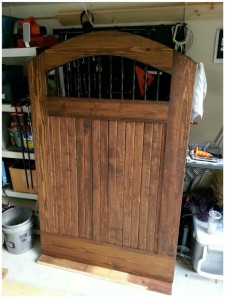
Here you can see the gate after a couple coats of the selected color. At this time I had not applied a weatherproof topcoat.
I finished the gate with three coats of spar urethane varnish. I chose the finish because it offers a good level of UV and waterproofing protection.
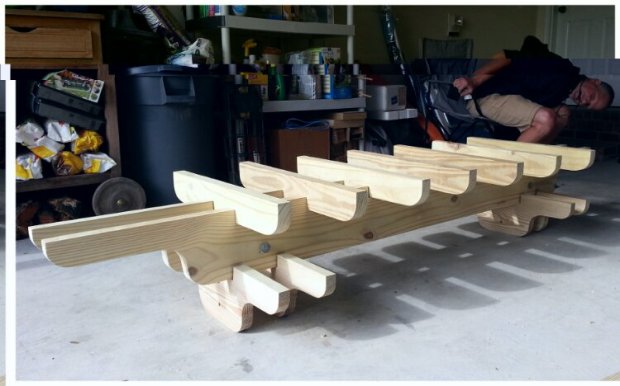
Before the gate could be hung, the arbor and fence needed to be built. Here you can see the top of the arbor assembled in the garage prior to installation.
There’s always some smart-ass in the background to check if your work is level and true.
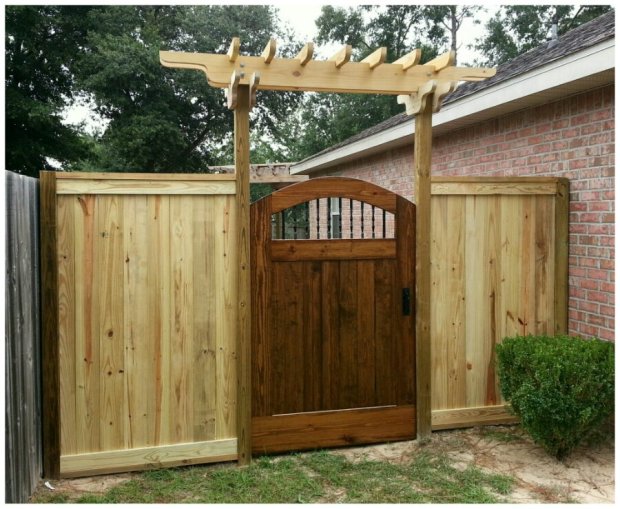
And here’s the finished product! Well, almost finished. After looking at this for a week we decided that the top was to high above the door. I removed the arbor and shortened the uprights by 10 inches. The gate looked proportional and better following this.
This project turned out a lot nicer than I had initially anticipated. On several occasions I’ve seen people stopped in front of the house pointing and have had a few inquiries about building one.
Garage Light Upgrade
Posted by Christopher in Projects, Workshop Design on November 24, 2013
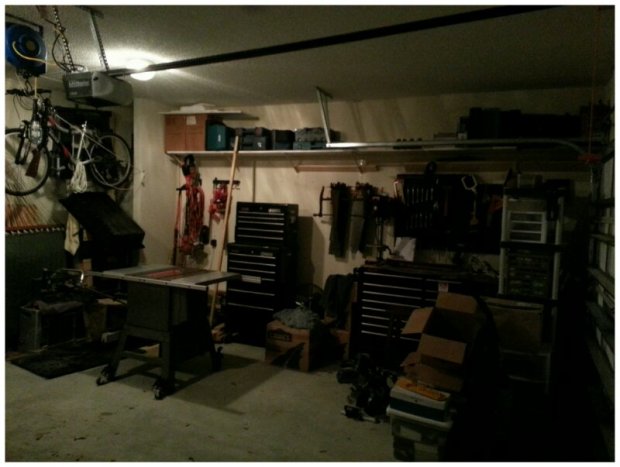
I have recently moved into my girlfriend’s house and have been organizing half of the garage into a workshop. The garage lights are the typical $10 two bulb fixtures. These things are awesome at throwing shadows and horrible for productivity. The picture actually makes it look a little worse than it really is, but you can see that the farther you get from the light, the darker the room gets.
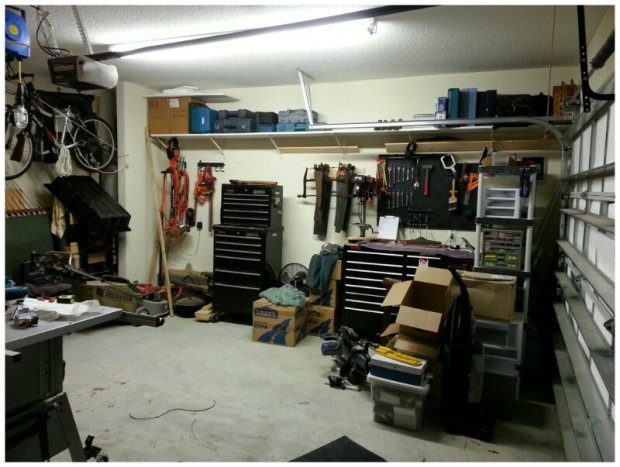
When designing and setting up your workspace, it’s important not to forget the lighting. After twenty minutes of walking the light isle of my local hardware store, I decided to install an 8 foot high output commercial grade florescent light fixture. I chose the commercial grade because it’s assembled with better quality components and was only $15 more than the standard 8 foot light. The final bill was right at $100. This included the light fixture, two high output bulbs and a pair of clear protective plastic sleeves. The sleeves aren’t necessary, but i recommend them if you’re even the slightest bit as accident prone as myself. The install was easy and took me about an hour. I recommend a second set of hands if your installing one of these 8 foot fixtures. Here’s the result, and man-o-man is this an improvement!
The light is long and bright enough that even when the garage door is up and blocking it, there’s plenty of light.
And that’s the light upgrade. I’m planning to change out the second fixture soon but it’s honestly not necessary. My next project is a workbench and cabinets to store my saws and bench planes.
Saturday morning tool hunt
Posted by Christopher in Projects on November 4, 2013
Saturday I ventured out with a friend to checkout a Craigslist add for a huge liquidation sale that turned out to be a bust. Nothing but old moldy furniture and Chinese made power tools. In an attempt to save the day we hit up a few local antique spots on the way home and both of us ended up finding a few new(old) tools!
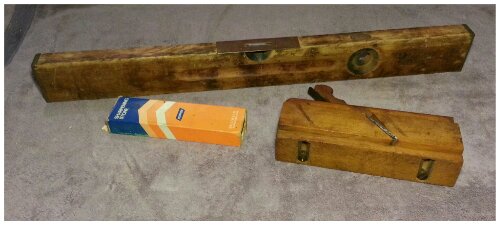
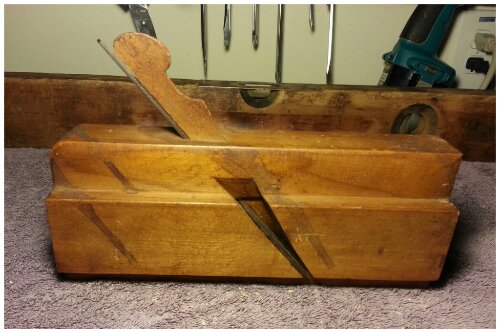
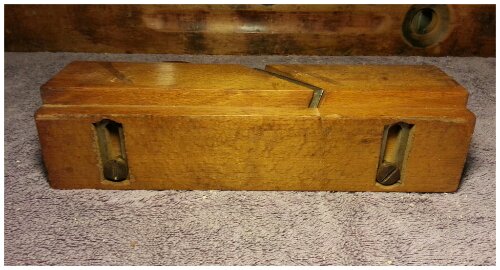
At the first stop I found this wooden adjustable rabbet plane.
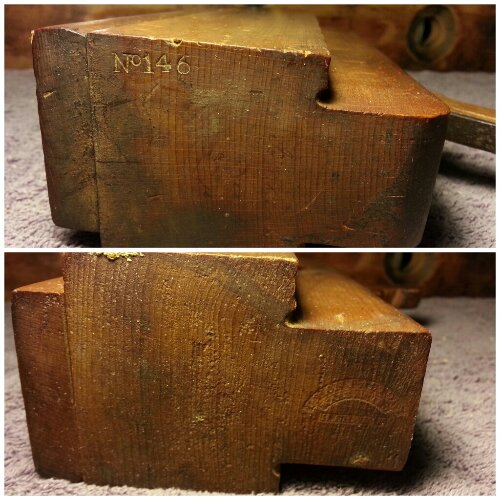
I’m still looking into the history and manufacturer but it’s beautiful and in great shape. There’s a No.146 stamped on one end and appears to be a very faint manufacturer’s mark on the opposite. It appears to read “Union Factory Warranted” and “H. Chapin”.
Hermon Chapin was a well known wood plane maker in Connecticut during the early 1900’s. I’m looking forward to researching more into H. Chapin and his planes.
It’s 9.5″ long, 2.375″ wide and the body is 3.75″ tall including the fence. The iron is 1.625″ wide at the cutting edge and the fence can be adjusted between 0 and1.375″.
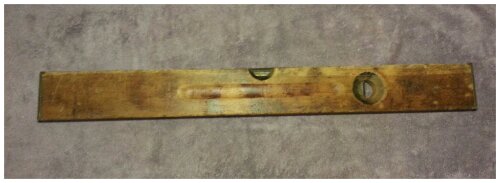
My second find was this Stanley level.
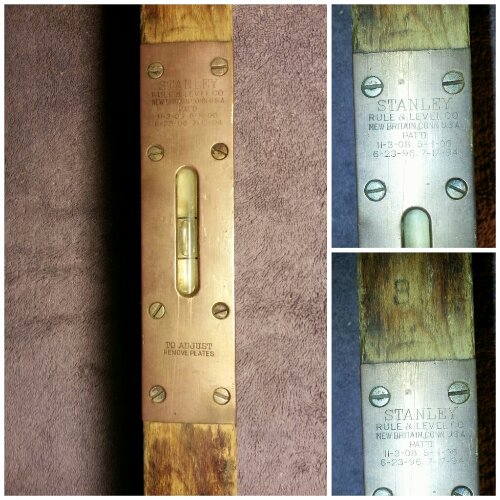
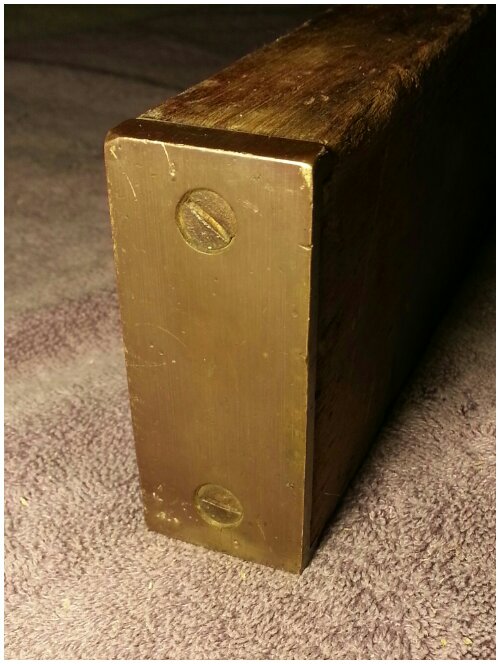
I don’t pay much attention to wooden levels because they are usually broken or completely beat up. This one has both vials in tact and the body is pretty solid. It’s 28.375″ long, 3.125″ tall and 1.376″ wide. The main vial plate is marked with four patent dates (7-17-94, 6-23-96, 5-8-06, and 11-3-08). There is a “3” stamped onto the top of the level between the two brass plates.
The ends are capped with brass plates and the viles are adjustable which means that after I clean the body up I’ll be able to calibrate it. It’s pretty accurate now when compared to one of my modern levels. Look for a future post on my refurbishment of this level.
After some quick research I think it’s a No. 3. Unfortunately there doesn’t appear to be a bunch of information on Stanley’s line of levels. I’ll do some more digging but if you have any information, I welcome your comments.
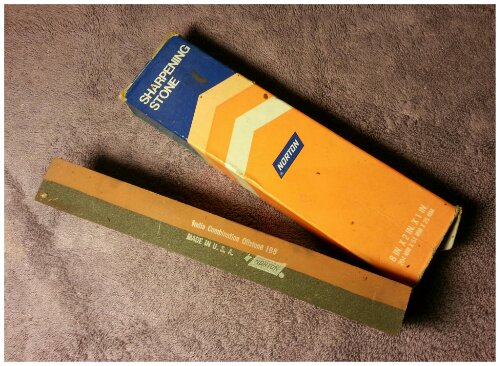
The last item of the day was this sharpening stone made by Norton. It’s a 8″x2″x1″ combination oilstone and appears to be in mint condition.
I’ve been looking for a of stone but was hesitant to fork over $20+ for something at the local hardware store. At $8, I couldn’t pass it up. It’ll come in very handy when cleaning up chisels and plane irons.
All in all, it was a pretty good Saturday. Expect to see more of these tools in future posts. I welcome comments if you have any questions or know something about one of these tools.



Recent Comments